
Amber Science
Why Dominican Blue Amber Appears Blue: The Fluorescence Phenomenon
A practical, gemological guide to seeing Dominican blue amber fluorescence in sunlight, daylight and long-wave UV—plus honest comparison and photography methods.
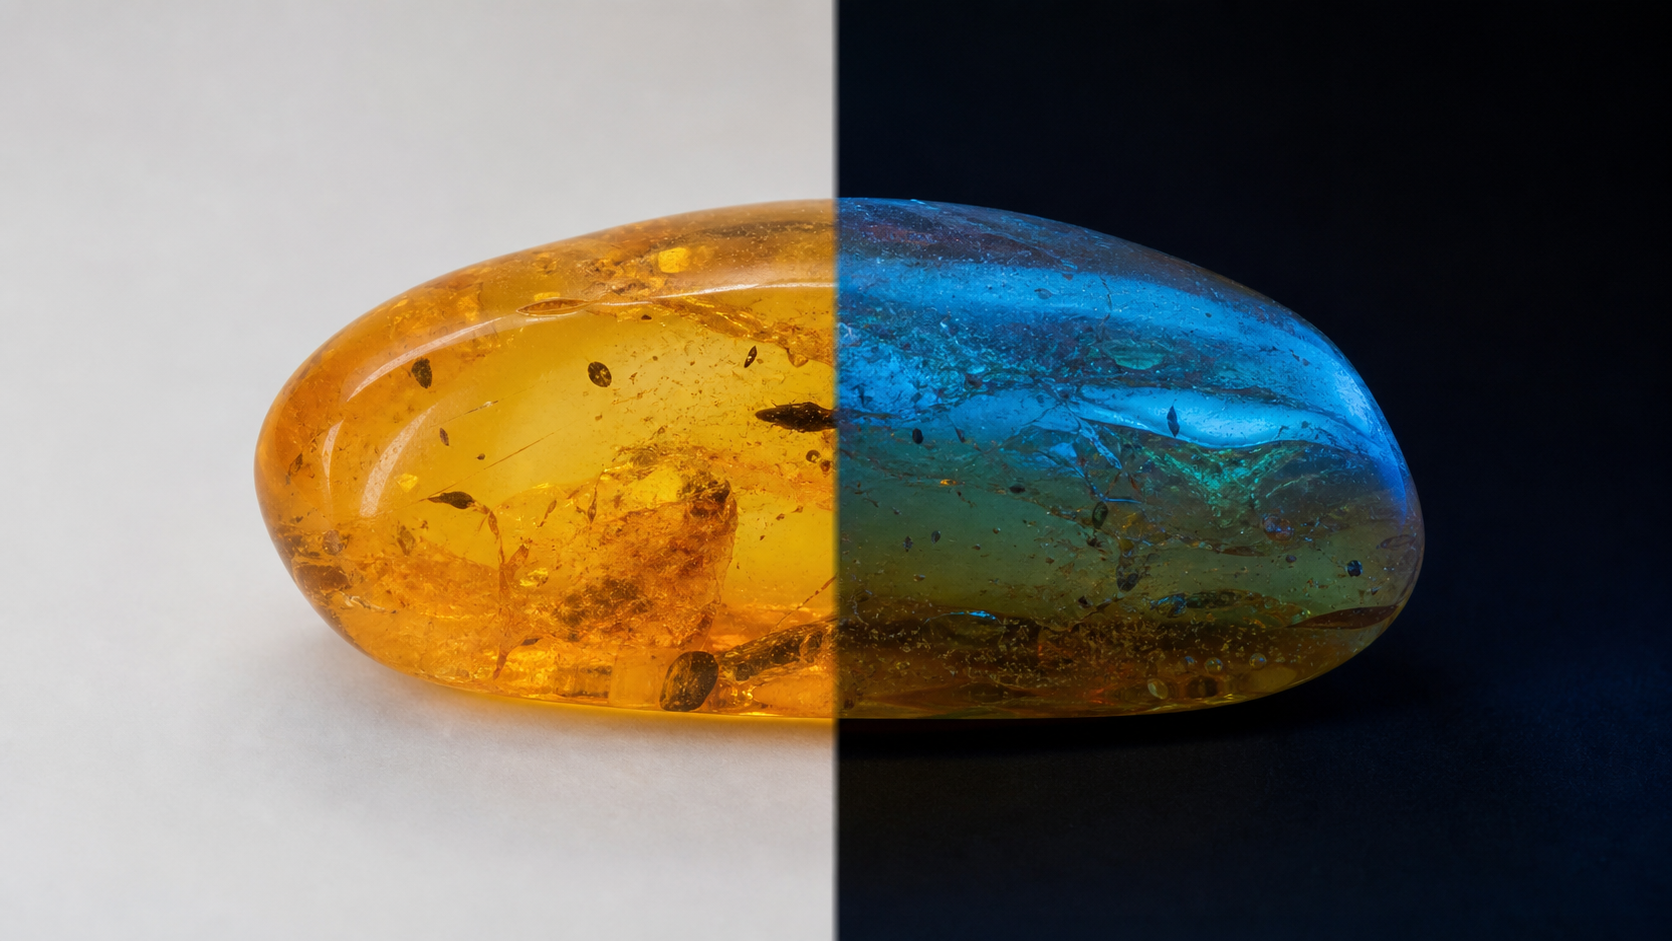
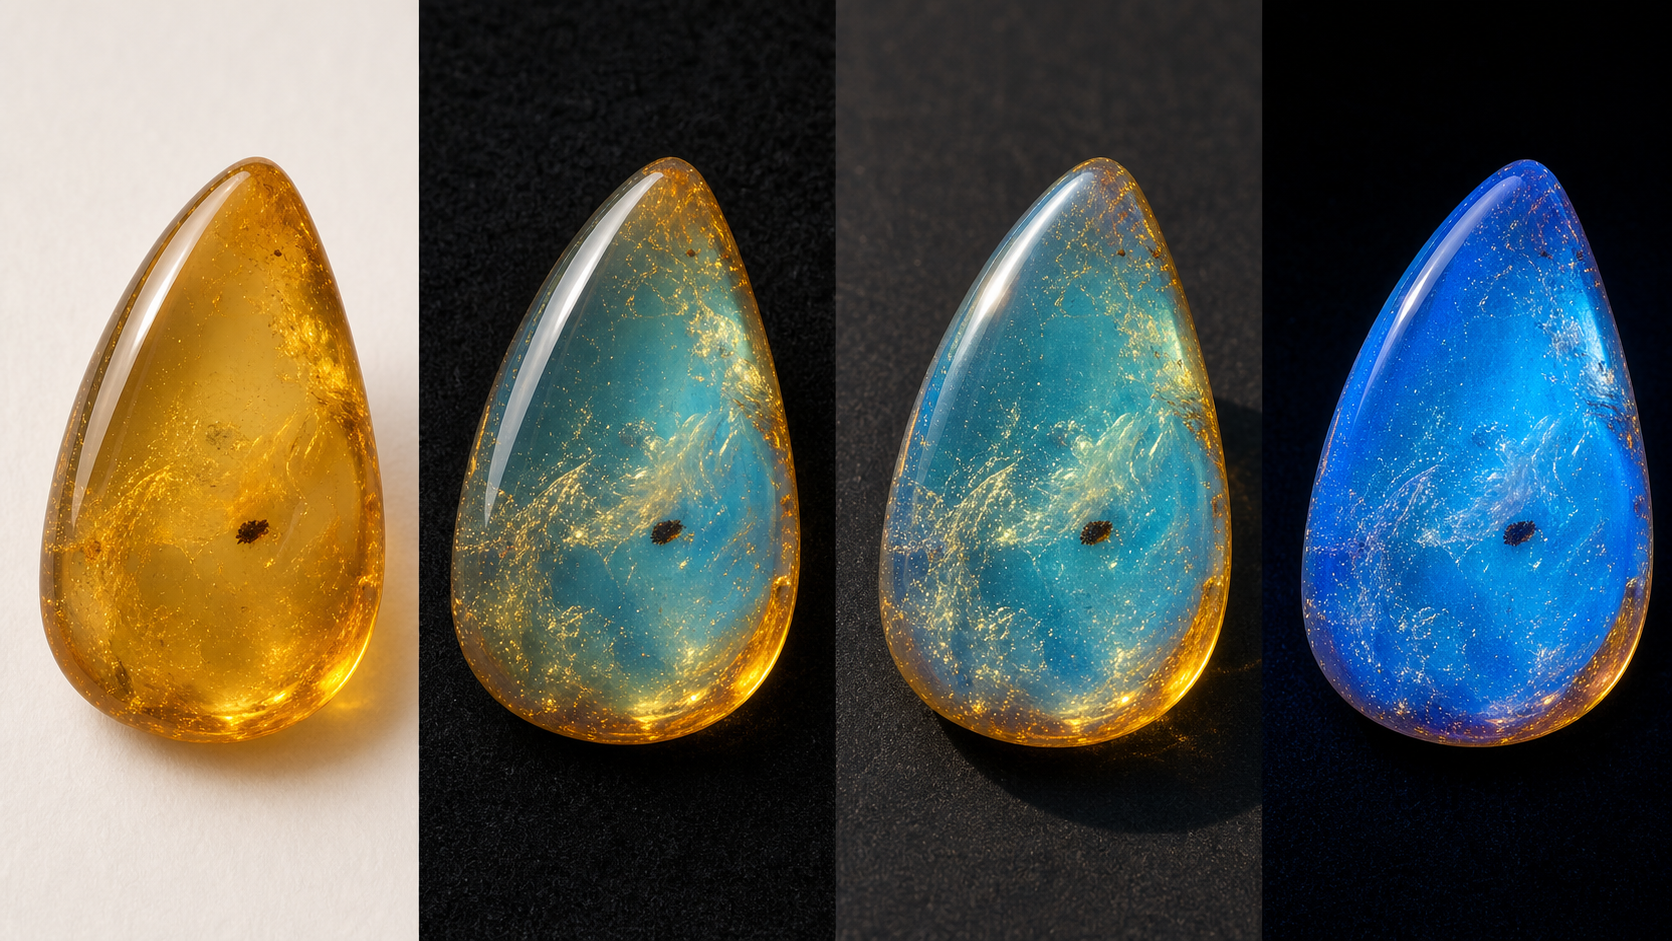
Original editorial illustration created for this guide. It is not a laboratory specimen, archaeological photograph or reconstruction.
Golden body color, blue optical effect
Many pieces sold as Dominican blue amber remain colorless, pale yellow, honey or orange when viewed in transmitted light or on a white background. The blue appearance is fluorescence at or near the surface, seen together with reflected light. It is a real optical response—not blue dye—but it does not mean the material has a uniform blue body color all the way through.
This explains why the same genuine piece can look golden indoors, greenish-blue near a window and much more intensely blue outdoors. The result depends on the specimen, illumination, background, viewing angle and camera.
Four useful viewing conditions
The fastest sunlight test
- Start with the ordinary view. Look at the clean, dry amber indoors on a white surface. Note its actual transmitted or body color.
- Use a matte black background. Black cloth, velvet or non-reflective card works better than a glossy phone screen.
- Move into natural daylight. Outdoor daylight is usually more effective than ordinary warm household bulbs. Begin in open shade, then compare in direct sunlight.
- Turn the piece slowly. Let sunlight strike the front or upper surface at an angle while you view from another angle. Do not only hold it directly between your eye and the sun; strong transmitted yellow light can conceal the surface glow.
- Shield glare. Shade your eyes and the camera with your hand without shading the amber itself. Move until bright white reflections no longer cover the surface.
- Compare again on white. Moving the same piece between black and white helps separate fluorescence from its honey body color.
How to see it indoors
Place the amber on matte black material beside a bright window during the day. Face the stone toward the window and view it from a slight side angle. A daylight-balanced lamp may help, but many warm-white household LEDs contain too little useful near-UV or violet energy to show the effect strongly. Room light alone can therefore make a genuine blue-fluorescent piece appear mostly yellow.
For a convincing comparison, keep the piece, camera and exposure as similar as possible and change only the background or light source.
Using long-wave UV responsibly
In a dim room, a long-wave 365 nm UV lamp can reveal blue fluorescence very clearly. Place the amber on matte black cloth, illuminate it from the side, and observe the light emitted by the surface rather than staring into the lamp. GIA research reports that long-wave UV response is generally stronger than short-wave UV response in the blue amber samples studied.
Safety: never look into a UV beam, avoid directing it at eyes or skin, keep it away from children and follow the lamp manufacturer’s instructions. UV response is useful for observing fluorescence, but a handheld lamp by itself does not prove geographic origin or authenticity.
Why black and viewing angle matter
A white background sends a large amount of ordinary scattered light back to the eye, which can overwhelm the blue emission. Matte black absorbs much of that competing light. Laboratory observations likewise use controlled geometry: illumination reaches the surface at an angle while emitted light is observed separately. At home, gently rotating the amber and changing the relationship between light, stone and eye recreates that principle without pretending to be a laboratory test.
How to photograph the blue effect honestly
- Photograph the exact same piece first in ordinary neutral light on white, then in daylight on matte black.
- Clean fingerprints gently with a soft cloth; do not oil the surface to increase shine.
- Turn off flash and strong room lights, which can add glare and dilute the fluorescence.
- Tap or lock exposure on the amber. Reduce exposure slightly if highlights are clipped, but do not push saturation until the honey areas also turn blue.
- Keep automatic filters, “vivid” modes and aggressive white-balance changes off.
- Include the lighting condition in the caption. A UV photograph must be labeled as UV, not presented as its ordinary room-light color.
Phone cameras process color differently, so the screen image may not exactly match the eye. Showing ordinary-light and fluorescence views together is more informative than one dramatic image.
If the blue is difficult to see
- The background may be too bright or glossy: switch to matte black cloth.
- The light may be unsuitable: try daylight outdoors or beside a bright window rather than a warm household bulb.
- Glare may cover the surface: change the angle and shield your eyes.
- You may be looking through the stone: observe reflected surface light, not only transmitted light.
- The specimen may fluoresce weakly: intensity naturally varies. Not every piece of Dominican amber is blue amber.
- The camera may be hiding or exaggerating it: compare with your unaided eye and take a neutral reference photograph.
What laboratory research found
GIA researchers studied 247 specimens from the Dominican Republic, Mexico and Myanmar. Under D65 illumination on white, samples appeared colorless to yellow or orange; on black, blue and greenish-blue fluorescence became easier to classify. Dominican blue amber showed characteristic emission features near 450, 474 and 508 nm and was especially efficiently excited near 415 and 441 nm in the reported measurements. Greenish-blue material included an additional longer-wavelength component.
Those measurements require controlled instruments. Visual color, a photograph or a simple UV-lamp reaction is not a complete origin test.
How to evaluate a listing
Look for exact-item photographs, an ordinary-light view, a dark-background daylight view and clear disclosure when UV was used. A responsible listing distinguishes honey body color from fluorescence and does not imply that every angle will look electric blue. Also avoid assuming every Dominican amber piece is blue or every blue-fluorescent specimen must be Dominican; similar-looking fluorescence occurs in material from other deposits.
Sources and further reading
Explore exact-item pieces
Every available piece is individually photographed, so the item shown is the item you receive.
Shop related piecesMore journal articles